The demo data offers one panel, #TR-ALLOCATION. The panels #TR-ALLOC-V1 and #TR-ALLOC-V2 were used with a previous version of allocation and do not contain the timeline view.
To customize the #TR-ALLOCATION panel it is best to copy the panel to a new one and change the new one the way you want. To switch to the new panel, change the parameter of the TR-SHOW_ALLOC_PANEL command that opens the Allocation panel (on the layout menu of the hospitality type using allocation).
Note: An Allocation panel must have an ID starting with #TR-ALL.
The information shown in the data tables behind the lists is easily customizable and you can select different POS tags to be displayed as description and glyphs on buttons.
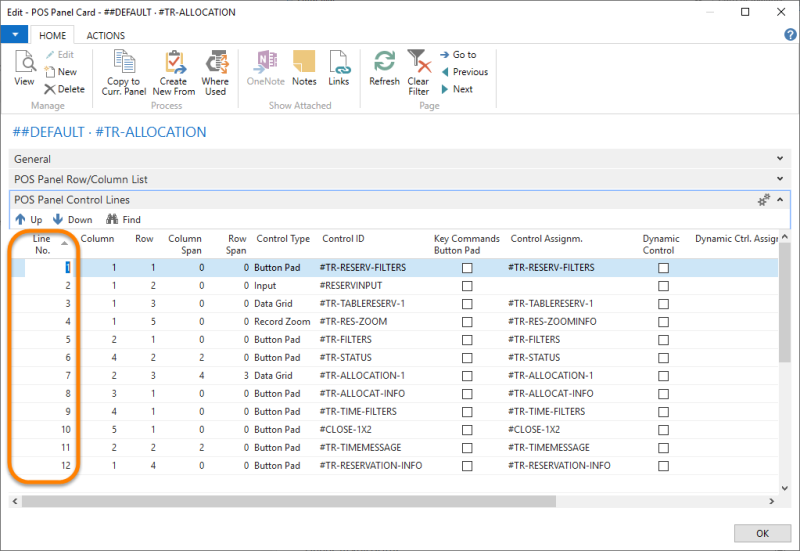
The panel structure
To be able to customize the Allocation panel you need to understand how it is built. The following picture shows the control lines of the panel:
The Allocation panel where each section of the panel is marked with the number of the corresponding panel control line:
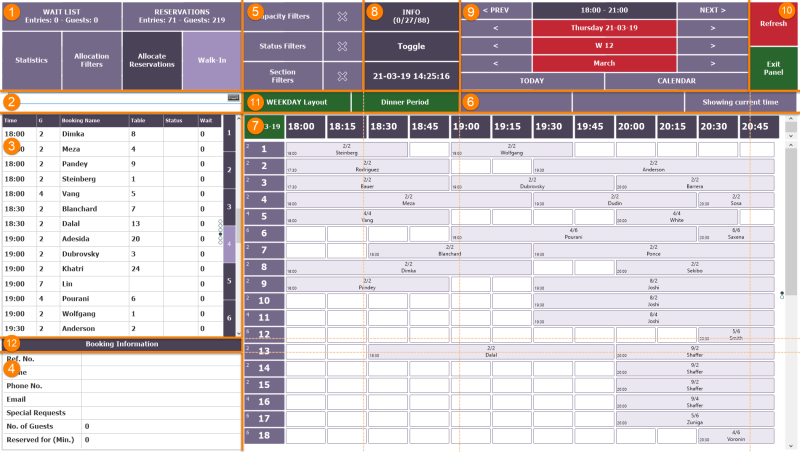
Note: Line number 7, Data grid, points to the section in the panel that holds the dining table view, that is, either the timeline view, graphical view, or dining table list view. The panel always starts up with the timeline view and you can toggle between the other views with the TR-A-VIEW-TOGGLE command.
You can arrange these sections in a different way.
You can design the filter menus, scrolling menus, and action menus differently.
See Also
How to: Customize the Timeline View
How to: Identify Allocation Statuses Visually